Sign up for the Powder & Bulk Solids Weekly newsletter.
May 1, 2018
5 Min Read

NFPA Guidelines: Replacing Your Uncompliant Parts
Ashes to ashes, dust to dust. When your valves are compliant, they’ll never combust. Alright, so we might not win any poetry awards — but when it comes to valve compliance, we’re at the top of our game.
Here’s what you need to know to ensure your rotary valves are compliant with NFPA safety regulations.
Anatomy of a Rotor
When you’re checking for NFPA compliance, you’ll first want to make sure your valve has metal tips on the rotor assembly, as well as the outboard bearings. Mild steel, stainless steel, and AR400 steel will all work depending on your application, as long as the material is not rubber-tipped. Rubber or plastic tips will not withstand the pressure of a deflagration.
Beyond that, you can have either an open-end or closed-end rotor. Rotors should have a minimum of eight vanes. Six-vane rotors are uncompliant, but if your rotors have eight, ten or twelve vanes, they’ll generally be compliant.
Staying in the Clear
Rotor clearances are one of the biggest indicators of NFPA compliance. To quench the spread of flames along your conveying line in the event of an explosion, your rotor-to-housing tolerances must stay under the maximum of 0.0079 in.
You can do this in one of two ways: Either by measuring directly through the opening of your valve’s inlet or outlet, if it’s accessible, or by removing the endplate to take your measurements. You can find a more in-depth guide to the process here. [LINK: http://www.acsvalves.com/blog/read/title/are-your-valves-compliant-with-nfpa]
In other words, your maintenance program should involve regularly checking these clearances to make sure your valves stay compliant. If the tolerance ever goes above 0.0079 in., it’s time to replace your rotor assembly.
Explosion Prevention
The maintenance and replacement standards don’t vary too much across different applications. That said, if you’re working with more abrasive materials, we recommend going with a more abrasion-resistant rotor assembly to prevent wear and increase the lifespan of your valves.
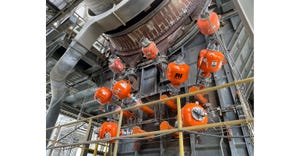
Your rotary valves will generally be paired with an explosion prevention system, which you should also check periodically to make sure everything works as it should. The dust collector should have an explosion release vent and a passive isolation flap valve to complete the flame-quenching system.
Many dust collectors will have an FT-style valve, which is a fabricated valve with wiper blades on the rotor tips. There are valves available for airlock applications that act as a drop-in replacement for some of those FT valves. If any of your existing valves with the flex tip need replacing, a drop-in replacement can help you comply with NFPA rules.
Further Reading
Looking for more information on NFPA compliance? Feel free to read this breakdown of NFPA 652 or this overview of plant deflagration — or, if you feel confident in your intel, take our NFPA Quiz to test your knowledge. For inquiries about a specific valve, contact an ACS representative
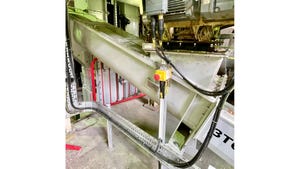
Are Your Valves Compliant with NFPA?
Rotor Assembly Tolerance Check
We only like explosions in the form of really cool ones in Michael Bay movies we watch from the comfort and safety of our own homes. We emphasize the word safety here, because in real life, explosions can have serious consequences and precautions must be taken to prevent them. This means staying compliant with NFPA in your plant or facility.
Though you can’t stop explosions by using a rotary valve, they can help stop the spread of flames along your conveying line, should an explosion happen.
That’s why we’ve put together a video guide on how to check your rotor-to-housing tolerances to ensure that they stay below the compliant 0.0079 in. Check it out, and a summary of the steps required, below.
What Steps Should I Take?
If the inlet or outlet of the valve is accessible, the clearances can be measured directly through this opening. If the inlet or outlet is not accessible, inspection is performed with the endplate removed. It’s easier to do this tail side because it’s not necessary to remove your drive package.
1. Loosen and remove chain drive guard
2. Loosen and remove bearing lock-collars
a. Remove allen set screw from collar and peen down groove formed by set screw using a small flat punch
b. Loosen collar by rotating collar in the same direction as the shaft rotation. Use drift pin in the through hole (not threaded set screw hole) and tap with hammer to rotate collar.
c. Slide collar off shaft
3. To measure the clearance between the rotor and the endplate, attach an indicator to the end of the shaft, and set it to zero.
4. Plush the shaft towards one endplate, and the indicator will show what the clearance is. There should be a minimum of 0.0079 in. on each side of the rotary valve.
5. Next, take all the bolts out of the tail side endplate
6. Remove the endplate off the housing by using a wheel puller tool and take out your set of feeler gauges.
7. Stick the gauges between the housing and both the bottom and top rotor blades until you feel friction from both feeler gauges.
If your tolerance is higher than 0.0079 in., it is time to replace your rotor. You can find a replacement kit here.
Things to remember to stay compliant
* Two vanes must be in contact with the housing at all times. We recommend using a rotor with eight or more vanes.
* Six-vane rotors are uncompliant with NFPA.
* Rotor vanes must be 3 mm thick.
* Rotor tips must be of metal construction. Rubber or plastic would not be able to handle the pressure of a deflagration
Article contributed by Brittany Dollimore, ACS Valves. ACS designs, engineers, and manufactures rotary valves for metering, feeding, and airlock in bulk material processing and pneumatic conveying applications. For more information, visit acsvalves.com.
You May Also Like
Editor's Choice

.svg?width=800&auto=webp&quality=80&disable=upscale)